
Setting Up Your iSavi
When you first receive your iSavi device you need to physically get it ready to use. Follow the instructions below to get your iSavi from in the box to ready to use:
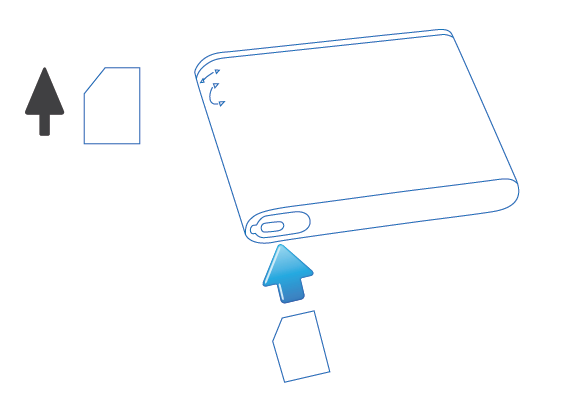
- Insert the Micro-SIM card with its gold-contacts facing down.
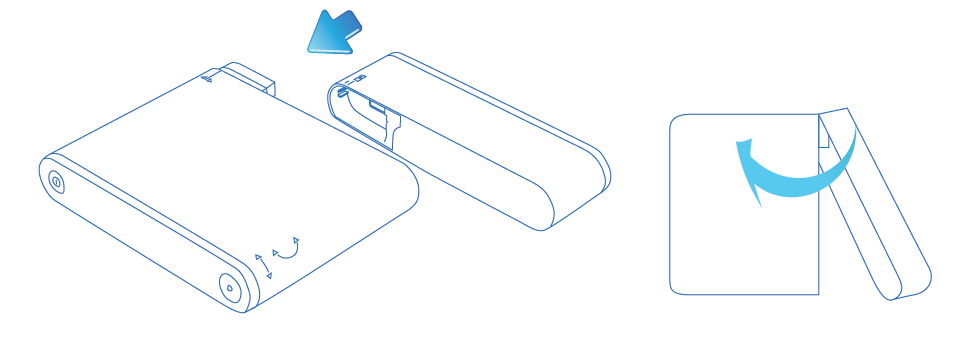
- Attach the battery gently in the direction as shown until a click is heard.
- Insert charger lead and then plug in the adapter.
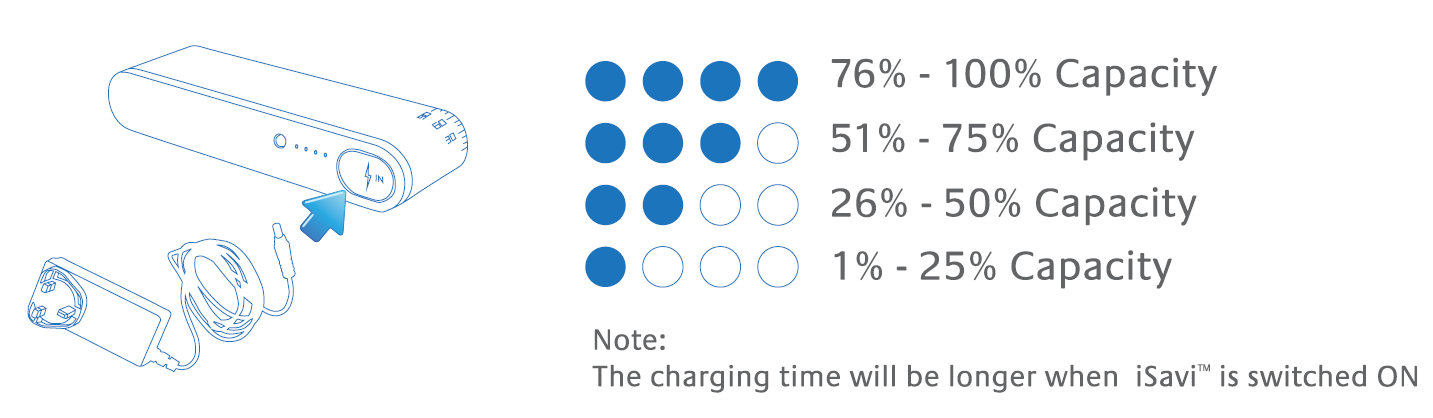
- Your iSavi should be charged for eight hours before first use. Charging will cease automatically once the battery is fully charged. You can check the battery level by pressing the "Battery Power Indicator Button".
- After charging, place your iSavi outside in a position with a clear view of the sky.
- Switch your iSavi on and leave it for a minimum of 1 minute. Your iSavi must acquire a GPS fix before you can connect to the network for the first time.
Pointing the Terminal and Connecting to the Network
Make sure you place your iSavi outside with a clear view of the sky. Your iSavi needs to be pointed towards the sky in the correct direction to ensure connection to the Inmarsat satellite network.
There are three methods for antenna pointing:
- LED visual pointing mode
- Audio assisted pointing mode
- Control app pointing assist
LED Visual Pointing Mode
By default, the antenna pointing is in LED mode.
- Tilt your iSavi up or down in the direction of the flashing green light until both "up" and "down" LEDs are solid green.
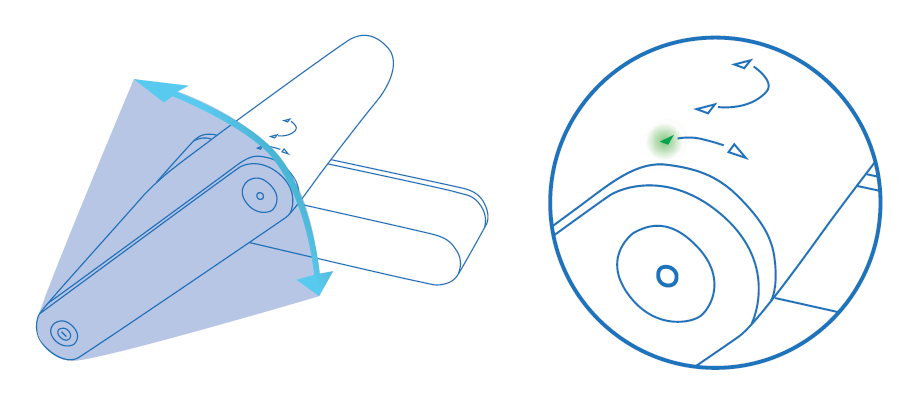
- Turn your iSavi left or right in the direction of the flashing green light until both "left" and "right" LEDs are solid green.
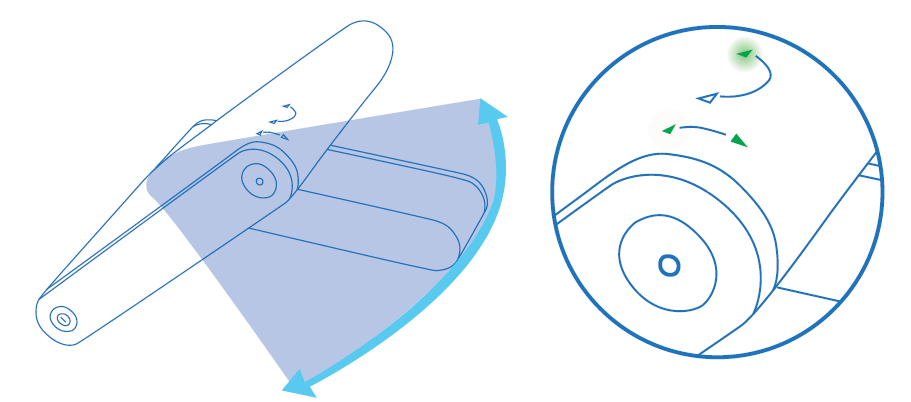
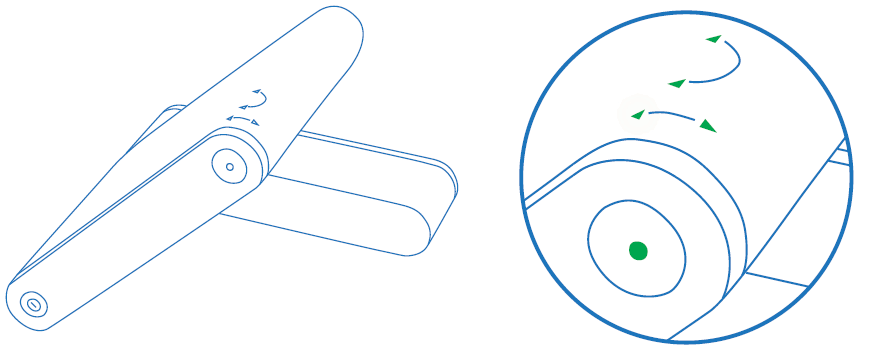
- When all four tilt and turn LEDs are solid green, press the flashing "Exit Pointing Mode" button. Your iSavi will now connect to the network.
Note:
Once the network is available, all the four antenna pointing LEDs will turn off after one minute. The LEDs of "Power" button and "Exit Pointing Mode" button may sometimes be hard to see under bright sunlight. Use the signal strength indicator in the Control app or web console in bright environments.
Audio Assisted Pointing Mode
The terminal is in LED visual pointing mode by default. To switch into audio assisted pointing mode and find a good signal:
- Press and hold "Exit Pointing Mode" button for 5 seconds. The four antenna pointing LEDs will change into a flashing green pattern when antenna pointing mode is activated. The beeping sound indicates the signal strength. The frequency of the beeping will become higher when the signal is stronger.
- First, tilt the terminal up to 45 degrees from the horizontal.
- Now turn the terminal slowly until the beeping frequency is maximized.
- Finally, tilt the terminal up or down and fine tune the position until a further increase the beeping frequency is heard.
- "Exit Pointing Mode" button will turn to flashing green when the signal strength is good enough for network registration.
- Press the "Exit Pointing Mode" button to exit antenna pointing mode and start network registration.
- Once network registration is completed, all the LEDs will turn off after one minute.
Antenna Pointing Using the IsatHub Control App
Before using this method, download the application from the Apple App Store or Google Play for iOS or Android devices, respectively. Data downloaded over the iSavi is chargeable, so use a free data service to acquire these apps where possible.
- Open the Control app on the smart phone or tablet.
- Follow the on screen instructions and press "Pointing Assist" for specific help.
- Connect to your iSavi over Wi-Fi by selecting it from the list of available Wi-Fi networks. The default Wi-Fi network name (SSID) and password can be obtained from the product label on the back of the iSavi terminal.
- For smart device control of your iSavi, open the IsatHub Control app and follow the instructions presented to get started. For control of your iSavi from a web browser, access the web console by opening any web browser and type http://192.168.1.35 (http://iSavi) into the address bar.
- To access your chosen control interface, the default credentials are:
Username: admin
Password: 1234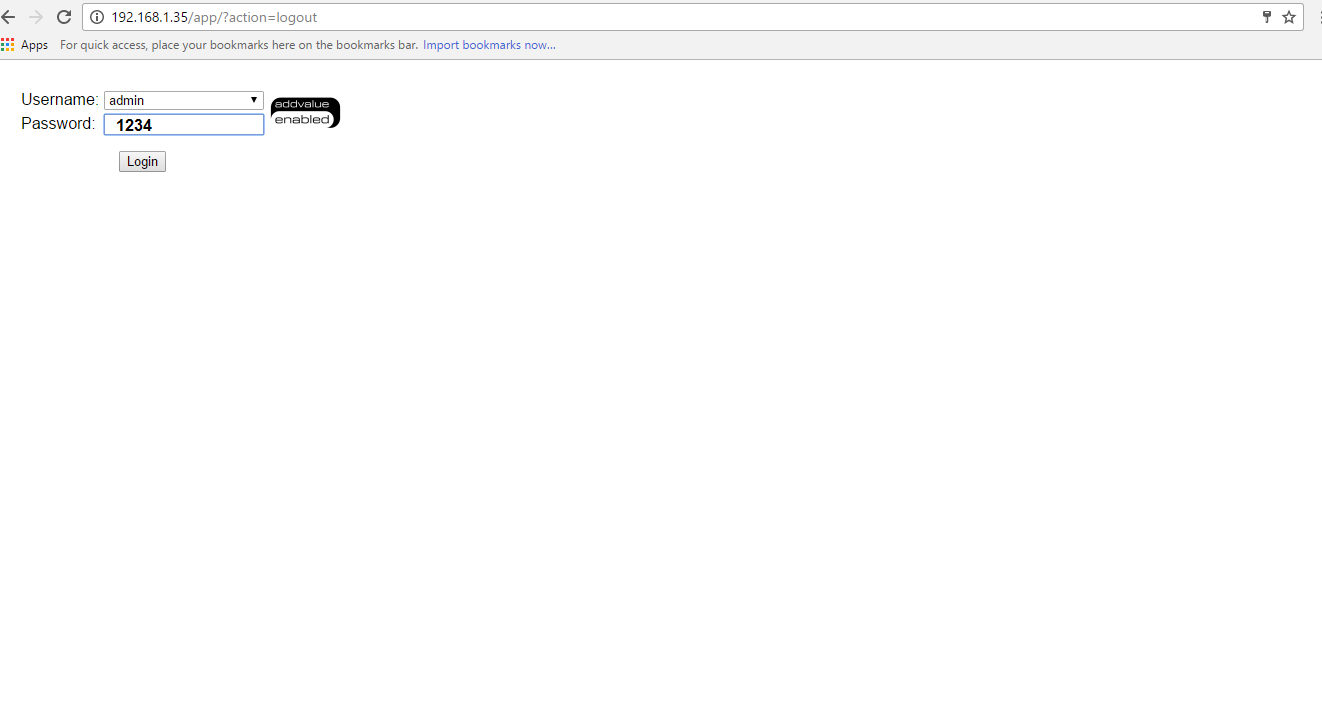
- Once your iSavi is connected to the network, you are ready to start making and receiving calls on any iOS or Android smart device.
NOTE: Before you first access data over the network you may need to enter the APN username and password supplied to you with your SIM card by your service provider. - Once your iSavi is connected to the network, you are ready to start a data session, Press the "Data On" button to begin and "Data Off" to end all connection to the Internet. The web console provides data access through the "Activate Data Connection" button on the Home page.
Note: To stop access to data press "Deactivate Data Connection"
Signal strength needs to be at least 42dB and above for an acceptable service to commence. You mat check the signal strength and registration status using the home page of the web console or the smart phone Console App.
If the signal strength level indicated in the web console is low under registered conditions, you can slowly adjust the terminal angle and monitor the signal strength displayed in web console.
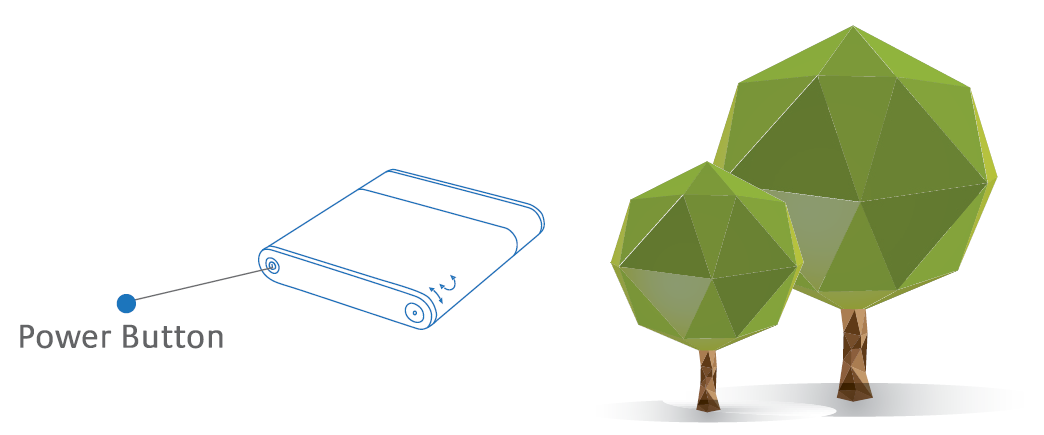
Turn off the terminal by pressing the "Power" button for five seconds.
Comments
0 comments
Please sign in to leave a comment.